How To Use A Beauty Blender Sponge
As an Amazon Associate, I earn from qualifying purchases.
Disclosure: Some of the links in this article may be affiliate links, which can provide compensation to me at no cost to you if you decide to purchase a paid plan. You can read our affiliate disclosure in our privacy policy.
A step-by-step guide to Using the Beauty Blender sponge
Introduction: makeup sponge
Are you ready to give your makeup routine an upgrade? Then it’s time to invest in a Beauty Blender! This tool is a must-have for all beauty enthusiasts, from beginners to experienced pros.
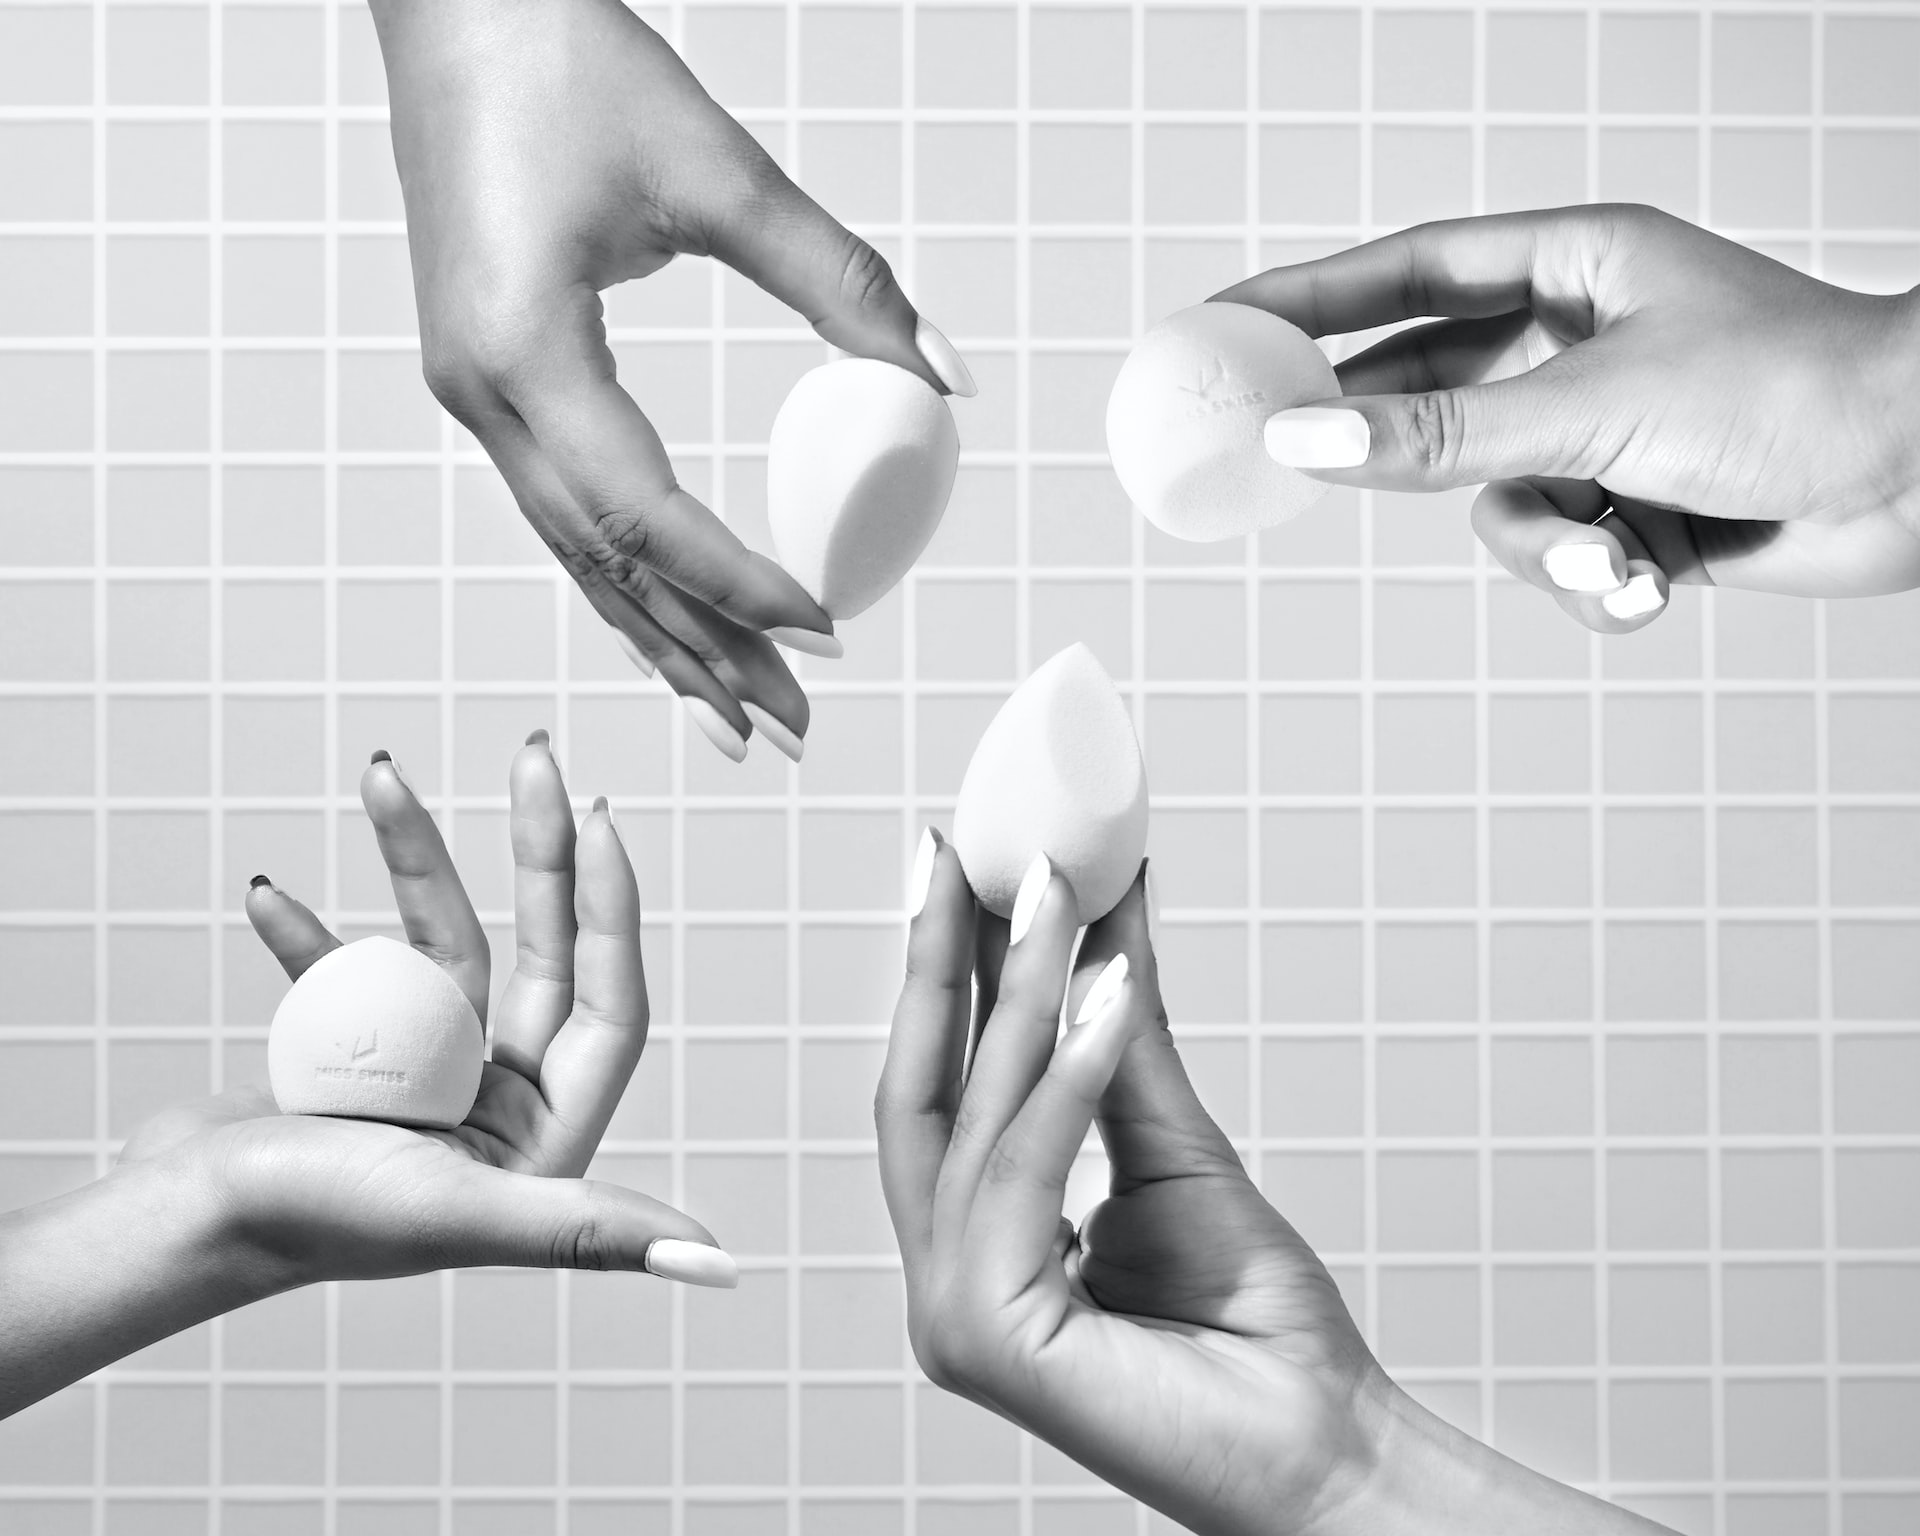
A Beauty Blender is a versatile makeup sponge that can help you achieve a flawless complexion. It helps you blend foundation seamlessly and evenly, and can even be used to apply and blend concealer, highlighter, contour, and blush. Plus, the unique egg shape makes it easy to reach hard-to-reach areas like around the nose or the inner corners of the eyes.
You’re probably sold on the idea of using a Beauty Blender, but maybe you’re not quite sure how to use it. Not to worry! In this article, we’ll walk you through exactly how to apply your makeup with a Beauty Blender step-by-step. Let’s get started!
What Is the Beauty Blender sponge and Why Do We Use It?
So, what is a Beauty Blender? It’s a unique makeup applicator featuring a round, spongy material ideal for absorbing and depositing liquid makeup evenly and perfectly onto your skin.
The Beauty Blender is designed to give you an airbrushed look without streaks or smudges, creating an even tone that looks soft and natural. Plus, the sponge is super soft and gentle on the skin, so you won’t have to worry about tugging or pulling your face while applying.
But why use a beauty blender in the first place? Well, unlike other applicators or brushes, the Beauty Blender won’t soak up all your product. This means you’ll get better coverage while using fewer products—saving you time and money! Plus, using the Beauty Blender helps blend in foundation or concealer seamlessly into skin for undetectable coverage that looks like it was applied by a pro.
Top 5 Beauty blenders by brands
If you’re looking for the perfect beauty blender, there’s a lot to choose from. Here are 5 of the top-rated ones by brand:
Bella Illume Beauty blender
This one is cruelty-free, vegan, and made of high-quality materials that are strong, yet still soft and bouncy. It also features a pointed tip that can easily blend out tight spots like around the nose or eyes.
Real Techniques Miracle Complexion Sponge
This is a budget option that performs well without breaking the bank. It’s highly absorbent and is designed with special edges so it can be used to reach tight corners and contours on your face.
Beauty Junkees Makeup Blending Sponge
This beauty blender has an ergonomic design that fits comfortably in your hand for easy application. It also has two sizes (large and small) so you can use it for blending larger areas as well as more precise details. Plus, it’s latex-free for those with skin sensitivity.
Wet n Wild Miracle Skin Perfector Blending Sponge
This affordable sponge has a teardrop shape which makes it perfect for contouring and getting into hard-to-reach spots on your face. It even comes in two shades (pink and green) so you can choose your favorite color!
The Original Beauty Blender Pro Sponge This one is great for those looking for professional results at an affordable price point. It blends out the foundation quickly with its pointed tip, cell structure design, and super soft texture — all without absorbing too much product.
Preparation Steps Before Using the Beauty Blender
Before you get started with your beauty blender, there are a few preparation steps you should take. Here’s a quick rundown:
-
Clean Your Face – Start by washing and drying your face with a gentle cleanser. This will make sure any oils or dirt on the surface of your skin won’t interfere with the makeup application process.
-
Moisturize – Once your face is clean and dry, apply a light layer of moisturizer to ensure that the foundation or concealer goes on smoothly and evenly.
-
Prime Your Skin – For an extra flawless finish, consider priming your face with a primer product specifically designed for use with beauty blenders. This helps create an additional barrier between your skin and the makeup, resulting in more even coverage and longer-lasting wear time for your look.
Once these preparation steps are complete, you’re ready to begin using the Beauty Blender!
How to Correctly Apply Product With a Beauty Blender
You may be wondering how to correctly apply products with a Beauty Blender. Don’t worry, it’s easier than it looks! Here are the steps you need to take:
1. Wet Your Beauty Blender
If you want to get the best results when using a Beauty Blender, it’s important that you first wet the sponge with warm water. This helps make the sponge softer and expand its size, which will help ensure an even and smooth application of any products that you use.
2. Squeeze Out The Water
Once your Beauty Blender is wet, you’ll want to squeeze out any excess water before applying your products. Doing this will help make sure that your product isn’t diluted by the water, leaving a streaky or patchy finish.
3. Apply Product
Now comes the fun part—applying the product with your Beauty Blender! Start by dapping small amounts of product onto your skin in the areas where you want coverage or color. Then, simply use the dampened Beauty Blender to blend out the makeup for a flawless finish.
If needed, you can add more products as needed to get desired coverage or color payoff. Just remember: don’t forget to wet your Beauty Blender again if it starts to feel dry and stiff—this will help ensure an even and smooth application every time!
Different Uses for the Beauty Blender
Believe it or not, the Beauty Blender is not just for foundation application. It also a great tool to use for all kinds of other beauty needs, like buffing out concealers or blending out contour and highlight.
Here’s how you should use your Beauty Blender for different things:
Concealer
If you’re using a thicker consistency of concealer, it’s best to use your Beauty Blender in a stippling motion to blend the product out, creating a smooth and even finish.
Contour and Highlight
The key here is using a light pressure when blending out your contour line. You should also use the pointed side of the blender for more precise blending. Then, use the larger end of the blender to lightly blend out any harsh lines – this will give you an airbrushed finish!
Setting Powder
For setting powders, it’s best to press the product into your skin with the Beauty Blender. This technique will give you a more subtle finish rather than dusting away the product, giving you an overall more polished look!
Common Mistakes Made When Using a Beauty Blender
Using a beauty blender doesn’t have to be complicated, but there are a few common mistakes people make when first getting started, and if you can avoid them you’ll be well on your way to flawless makeup application. Here are a few of the most common mistakes:
Not Wetting It
When using a beauty blender, it should always be wet first. If you don’t wet it enough, or at all, your makeup won’t blend properly, and it won’t give your skin the natural look you’re hoping for. Be sure to soak and squeeze out any excess water before each use so that your beauty blender is damp but not dripping wet.
Not Cleaning It
It’s very important to remember to clean your beauty blender regularly! If it isn’t cleaned, bacteria can build up and oil will accumulate – this will lead to clogged pores, more breakouts, and an overall less-hydrating application of makeup.
Using Too Much Product
Since the beauty blender blends product into the skin more efficiently than a brush or sponge can do it alone, you don’t need as much product as you would normally use with other tools. Start with just a bit of product on your face or even in the palm of your hand before blending it into the skin with your beauty blender—this will help prevent cakiness and wasted product from having too much.
How Do I Apply Foundation With a Beauty Blender?
So, you know how to use Beauty Blender now—but what about using it to apply foundation?
How to apply foundation with a sponge for beginners Using a Beauty Blender to apply foundation is super easy—but there are a few key steps you should follow. How to use a beauty blender for foundation application:
1. Ensure the Beauty Blender is damp
The first key step is making sure the Beauty Blender is damp. If it’s too wet, your foundation won’t blend in properly—but if it’s too dry, you won’t be able to pick up and apply enough foundation. The sweet spot? Give it a few squeezes, and you’ll know when the sponge feels damp enough.
2. Apply product to your face in small circles
Once your Beauty Blender is damp, dab on some product with either one of your fingers or a brush. Then, use small circular motions on your face to blend it in evenly — ensuring that there are no streaks left behind and that your foundation looks totally seamless.
3. Use different sides for different areas of your face
You can also use different sides of the Beauty Blender for certain parts of your face. For example, the pointed end of the sponge can be used for precise blending around the eyes and nose area; while the flat side is awesome for larger surfaces like cheeks, chin and forehead areas.
What Other Products Can Be Used With a Beauty Blender?
You might be wondering, “What other products can I use with my beauty blender?”
The good news is, the possibilities are pretty much endless! Here are some great products to pair with your beauty blender for even better results:
Primers
Primers help keep your makeup in place and give a smooth base to apply the rest of your makeup. Applying a primer before you apply your foundation will also make it last longer.
Concealers
Using a concealer will help cover up any blemishes or discoloration on your skin before you apply foundation. Applied with a damp beauty blender, it’s also a great way of getting even coverage without needing to use too much product.
Setting Powders
To finish off your look and make your makeup last even longer, applying setting powder is essential. Use the beauty blender to press it into the skin, rather than wiping or brushing it across – this will give you even coverage without leaving patches.
Cleaning and Taking Care of Your Beauty Blender
Cleaning and taking care of your beauty blender is a key step in getting the most out of it. After all, you’re applying makeup with something that was just on your face! Here’s what you should do:
Cleaning Brush
Clean your beauty blender after each use. Use either a gentle cleanser formulated for both sponges and brushes or a mild shampoo and warm water combination to cleanse your sponge. Make sure to squeeze out any excess water—you don’t want the sponge to be dripping wet.
Air Dry
Air drying is key—you don’t want any moisture left for bacteria and mold to breed, so use a towel to get rid of the excess water, but then let it air dry completely before using again.
Store Safely
When not in use, store your beauty blender in a clean and dry place. You can store them in a brush or sponge holder, or just lay them down on a towel, so they can air dry after cleaning.
Taking care of your beauty blender will ensure that it lasts as long as possible, and you get the most out of it—especially when it comes to getting that perfect makeup look!
What Are the Best Techniques to Use When Blending With a Beauty Blender?
When blending with a Beauty Blender, there are three techniques you should keep in mind:
Bounce Blending Technique
The bounce blending technique is when you lightly tap the Beauty Blender against the areas that need to be blended. This is the most common technique used by makeup artists and is great for getting an even finish for your foundation and concealer.
Stippling Technique
The stippling technique is when you press the Beauty Blender into your skin in an up-and-down motion. This is best used for applying heavier liquid or cream products onto the skin, like BB Cream or contour products, as it helps to really press the product into the skin.
Rolling Technique
The rolling technique uses a combination of tapping and pressing motions with the Beauty Blender to achieve an airbrushed finish. The Beauty Blender should be gently rolled onto the skin; this helps blend out any harsh lines and gives a more natural look.
Should U Wet your Beautyblender?
Using a Beautyblender the right way is key to achieving a flawless complexion. One of the most frequently asked questions about these tools is whether or not you should wet your Beautyblender before applying your makeup.
The answer may surprise you—while it might seem counterintuitive, the Beautyblender should be damp when used. When the sponge absorbs water, it’s able to absorb more product, which helps you get an even, airbrushed look.
When dampening your Beautyblender, there are a few important things to keep in mind:
-
Use lukewarm water—this ensures that your sponge won’t be too hot or too cold for use.
-
Squeeze out extra water after dampening it—you don’t need your sponge to be soaking wet in order for it to work well; just slightly damp will do!
-
Make sure to wet your sponge before each use—it’s best practice to do this every time you use your Beauty Blender instead of reusing a damp one from the day before. This is key for avoiding any bacterial growth on the sponge and keeping it hygienic and safe to use on your skin!
So whether you’re using powder, cream, or liquid makeup, remember to dampen your Beauty Blender before starting!
Can you use a beauty blender for setting powder?
Yes, you can definitely use a beauty blender for setting powder! Using a beauty blender to set your makeup with a powder is actually pretty simple.
The BeautyBlender Original Makeup Sponge is the OG brand of the beauty blender – it’s an egg-shaped sponge made from a hydrophilic material, which allows it to hold more water than traditional sponges. This makes it perfect for applying liquid and cream products, like foundation and blush.
Step 1: Prep the sponge
It’s best to use a damp beauty blender when applying foundation or other makeup products, rather than using it dry. To do this, simply wet your beauty blender with water and then squeeze out the excess before you begin working on your face.
Step 2: Apply powder product
Next, grab your setting powder and lightly sprinkle the product onto your face in sections—this will help you maintain an even application of the powder product. Once you have sprinkled enough product onto your face, use the beauty blender to buff it into your skin in circular motions, being sure to blend until there are no visible lines of product on your skin.
Step 3: Clean up
Now that you’ve applied your setting powder with a beauty blender, we recommend that you clean up any excess product around the edges of your face with a brush or tissue before continuing with any other makeup products.
With dozens of designs of beauty blenders on the market, finding one that works best for setting powder is easy! Just make sure that whatever design you choose is damp so that it absorbs as much of the powder as possible without leaving harsh lines on your skin.
Can I use a beauty blender for concealer?
Yes, you can use a beauty blender for concealer! The beauty blender’s shape and texture allow you to blend concealer quickly and easily.
Here’s a step-by-step guide to using a beauty blender with your concealer:
-
Start by dampening your beauty blender. This will help the product spread evenly and prevent it from clinging too much to the sponge.
-
Squeeze out a small amount of concealer onto the back of your hand or on a palette.
-
Use light, tapping motions to apply the concealer with the damp beauty blender, blending until you achieve your desired coverage.
-
Focus on areas that need more coverage, like under-eye circles or blemishes.
-
Once you’ve finished applying the concealer, use the same light tapping motions to buff any harsh lines for a seamless finish.
Which Beautyblender is best?
Let’s talk about which Beautyblender is the best. Well, that depends on what you’re looking for.
For Everyday Use
If you’re a makeup enthusiast who likes to experiment with new looks and change up your makeup routine frequently, then the Beautyblender Micro Mini Set is the perfect choice. This set includes four sponges in varying sizes, so you can choose the right one depending on your needs. From powder to cream, blush to foundation, this set has everything you need!
For Professional Use
If you’re a makeup artist who needs to create flawless looks for your clients, then the Beautyblender Pro Set is your go-to. This set comes with two original-size beauty blenders plus a mini blender and solid cleanser for easy cleaning and sanitizing between applications. Plus, each sponge is designed for up to 50 uses, so you won’t have to worry about replacing them often.
For Special Occasions
For those special occasions when you want to look your best, reach for the Beautyblender Bounce Liquid Whip Long Wear Foundation and Primer Duo. This duo includes one of the most popular foundation formulas and one of the most innovative primers out there — all packaged together in one convenient package, so you don’t need an extra step in your routine!
What is the point of a Beautyblender?
A beauty blender is an essential tool for makeup artists and beauty enthusiasts alike. It’s basically a sponge-like material that you use to apply foundation, blush, bronzer, and more, evenly and flawlessly.
Benefits of a Beautyblender
Using a Beautyblender has several key benefits. Here are just a few:
-
Natural Finish: When using a beautyblender to apply makeup, you won’t get any harsh lines or visible brush strokes. This ensures that your makeup looks natural and seamless.
-
Streak-free Application: The Beautyblender’s unique shape helps you get an even application without leaving any visible streaks or patches of makeup on your skin.
-
Faster application time: The Beautyblender helps you apply makeup faster, making it ideal for those days when you need to get out the door in a hurry!
-
Hygienic: Since the beauty blender is made from a non-porous material, it won’t soak up any dirt or bacteria like traditional makeup brushes do, making it much easier to clean and disinfect between uses.
It’s no wonder why so many people have become devoted fans of Beautyblender! Not only does it help save time and trouble with applying makeup but it also provides a natural finish that looks professionally applied – every time!
Are beauty blenders worth it?
You might be wondering if beauty blenders are worth the hype.
The answer is an emphatic yes! Beauty blenders have become an indispensable tool in makeup artists’ kits because they provide a smooth, even application of foundation, powder, and cream products. Plus, they’re easy to use and can help create a streak-free blended look.
Not to mention, beauty blenders are super affordable and long-lasting—in general, they should last up to 3 months if you follow the cleaning instructions correctly. Plus, there are lots of colors and sizes to choose from so you can find one that suits your needs!
Ultimately, beauty blenders are a great investment for those looking for an effortless way to get flawless makeup applications.
Conclusion
So there you have it: the complete guide to using Beauty Blender. It’s much simpler than you may have thought. Whether you’re using it for foundation, concealer, or cream blush, the Beauty Blender is a tool you must have in your arsenal. Take your time, experiment, and have fun! With a few simple steps, you’ll be a master of the Beauty Blender in no time.
Beauty blenders brands
When it comes to picking the right beauty blender for your makeup look, there are lots of brands to choose from. From traditional sponges and classic shapes to specialty designs, having a variety of beauty blenders is essential. So if you’re looking for top-notch quality and maximum versatility, here are the 5 best beauty blenders available on the market today:
1. Beauty blender Original Makeup Sponge
If you’re looking for the OG brand of the beauty blender, then this one is definitely it. This iconic teardrop-shaped sponge has become a staple in many makeup bags, and it’s easy to see why. It gives such a flawless finish that you won’t believe you’re not using your fingers!
2. Real Techniques Miracle Complexion Sponge
This is great if you’re into a more classic-style beauty blender. Its 3 uniquely shaped sides give more access points to blend out foundation into tricky areas like around your nose or mouth — perfect for creating an airbrushed finish without streaks!
3. Ecotools Total Perfecting Blender
This is great if budget-friendliness is a priority for you when shopping for makeup tools. These blenders are affordable and come in a range of colors and sizes so that you can easily find what works best for your makeup routine!
4. Sephora Collection Pro Airbrush Sponge
For those who want more precision and control with their makeup application, this one’s amazing. The flat edge also makes it easier to cover large areas quickly with minimal fuss — great for when time’s short, but you still need that perfect complexion look!
Skin Care FAQ
What are the 5 skin-care routine?
Now that you have a better understanding of your skin type and what products to look for, you can now put together a skincare routine that is right for you. To get started, the most basic skincare routine should include the following five steps:
- Cleansing – use a cleanser suitable for your skin type to remove dirt and cleanse the surface of your skin.
- Exfoliation – use a gentle exfoliator once or twice a week to remove dead skin cells, boost circulation, and reveal brighter and smoother skin.
- Toning– using a toner helps to restore the pH balance of your skin and remove any remaining traces of dirt and makeup.
- Moisturizing – this is essential for all skin types as it helps to keep your skin hydrated and protected from environmental damage such as pollution, sun exposure or extreme temperatures.
- Sun Protection – it is important to always wear sunscreen with an SPF of 15 or higher when going outdoors during the day, as this helps protect you from UV damage which can cause wrinkles, sun spots and other long term damage.
What are the 7 steps of skincare?
If you’re ready to create a skincare routine, there are 7 steps you’ll want to take. Here’s a quick snapshot of what that entails:
- Cleansing: You’ll start off with a gentle cleanser that won’t strip your skin of its natural oils.
- Toning: You’ll follow up with toner, which helps to remove any remaining residue from your cleanser and also helps even out your skin’s pH balance.
- Exfoliating: This step is optional, but if you choose to do it, don’t exfoliate more than once or twice a week.
- Moisturizing: Here’s where you apply the moisturizer of your choice, preferably one that works with your skin type and any particular concerns you may have (like acne or wrinkles).
- Using SPF: We can’t stress this enough—always use sunscreen, even when it’s cloudy or foggy outside! That way, you can protect your skin from damage caused by the sun’s UVA and UVB rays.
- Applying Spot Treatments: If you have acne or other blemishes, now is the time to apply spot treatments like salicylic acid or benzoyl peroxide to help clear those up quickly.
- Nighttime treatment: Before bed is when you should apply nighttime treatments like retinol for anti-aging benefits or spot treatments for acne-prone skins.. With these 7 steps in place, it won’t be long before see and feel healthier skin!
What are the essential steps for a skin care routine?
If you’re ready to get started with a skin care routine that works for you, there are several essential steps you need to follow. Here’s a breakdown of the basics:
Cleanse
It’s important to make sure your skin is clean and free from dirt, makeup, sweat and other impurities before taking care of it. You can choose between liquid or cream cleansing products or even a simple mouse cleanser. The most important part is that whatever product you choose should work well with your skin type.
Tone
Toning helps balance pH levels in your skin while also getting rid of any excess dirt and oil it may be holding on to. Look for toners that contain natural ingredients because they tend to work best without causing irritation or breakouts.
Hydrate
The next step is to hydrate your skin using a good moisturizer that’s specific for your skin type. If you have acne-prone skin, you may want to look for something oil-free; if your skin is dry, opt for something more hydrating. Whatever product you choose, be sure to apply it as directed on the package and give it time to sink into the skin before applying makeup.
Sun Protection And Prevention
No matter what type of skin care routine you’re following, don’t forget about sunscreen! Every day should include at least an SPF 30 sunscreen applied liberally all over the face — even if you’ll be inside all day. Sun protection helps prevent aging and other forms of damage caused by UV rays.
How can I determine which products are best for my skin type?
When it comes to skincare, products that are right for your skin type can make all the difference in getting glowing and healthy looking skin. But how can you determine which products are best for your skin type?
First, you need to figure out what your skin type is. Is it dry, oily, normal, combination or sensitive? All of these types have different needs when it comes to skincare products. Once you’ve determined your skin type, you’ll know exactly what ingredients to look for in skincare products that will nourish and care for your unique skin. Look for moisturizers that contain hydrating ingredients like hyaluronic acid or ceramides for dry skin. For oily skin, try an oil-free formula with salicylic acid or glycolic acid to help absorb excess sebum and keep oil levels balanced.
The next step is considering the texture of the product – whether it’s a cream or a lotion or something else entirely – then consider what other ingredients are in the formula that will work with your particular concern areas. For example, if you have aging concerns like wrinkles, look for wrinkle-fighting ingredients such as vitamin C and peptides to help reduce their appearance. If you’re concerned with dark spots due to hyperpigmentation look out for brightening ingredients like licorice extract and niacinamide (Vitamin B3). Finally, keep an eye out for natural and organic ingredients sourced from safe suppliers – these are usually the most gentle on the skin but also deliver powerful results.
By researching products, understanding your skin type and ingredient labels, you can put together a skincare routine that works best for you and truly
Are there any natural remedies or DIY treatments that can help improve my skin?
You may have heard of natural remedies or DIY treatments that can help improve your skin, and you’re wondering if they work. Well, the answer is yes—but the key here is finding out which ones are right for your skin type.
For example, if you have oily skin, many natural ingredients can help balance out your sebum levels and reduce shine. A few of these include lemon juice and yogurt, which you can apply to your face as a natural mask; honey, which can act as a moisturizer; or apple cider vinegar or tea tree oil, which can help fight off bacteria while reducing inflammation.
If you have dry skin, there are quite a few options to choose from such as oat meal and yogurt to make a mask or using almond oil as a moisturizer. You could also use aloe vera gel (which will help soothe any redness) or honey (which is an antioxidant).
Whatever ingredients you use, it’s important to remember that not all DIY treatments are created equal—especially when it comes to treating specific and unique skin care concerns. So be sure to do your research before trying them out and pay attention to what works for your skin and what doesn’t.
What potential risks should I be aware of when using certain skin care products?
It’s important to remember that some skin care products, especially those containing chemical or synthetic ingredients, can have potential risks. Before you start a new routine, it’s important to take a minute and research the ingredients in the products you are using. Be aware of any allergies you may have to specific components, as well as any possible irritations that may arise from mixing multiple ingredients together.
You should also take into consideration any pre-existing skin conditions, such as eczema or rosacea, and how the products you are using might affect them. If there is anything that concerns you, it’s best to consult with a dermatologist before adding these skincare products into your routine.
You should also take into account the dosage and frequency of use – overusing active ingredients can actually cause more harm than good. Make sure that you only use enough product for one application per day where necessary!

